Lazulite Setup Simplified: Installing ADB on Windows and MacOS
Learn how to install ADB on MacOS and Windows to use with Lazulite Bluetooth Android App with this easy-to-follow guide. Perfect for those new to ADB or needing a refresher. Get started with Lazulite today!
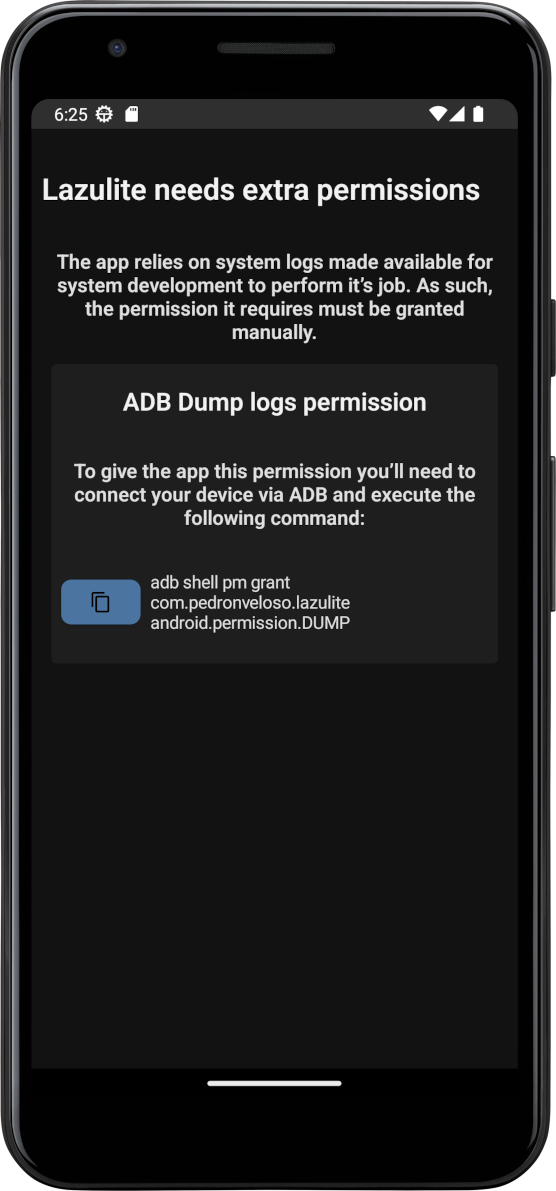
If you're planning to use Lazulite, a powerful app for real-time Bluetooth stats for Android, you'll need to run a special command through the Android Debug Bridge (ADB) on it's first run. Don't worry if you're not tech-savvy; this guide will walk you through every step of the process for both MacOS and Windows.
Step 1: Enable Developer Options on Your Android Device
Before you can use ADB, you'll need to enable Developer Options on your Android device. This process can vary slightly depending on your phone's brand.
For Most Android Devices:
- Open Settings: Go to your device's main settings menu.
- About Phone: Scroll down and select "About Phone."
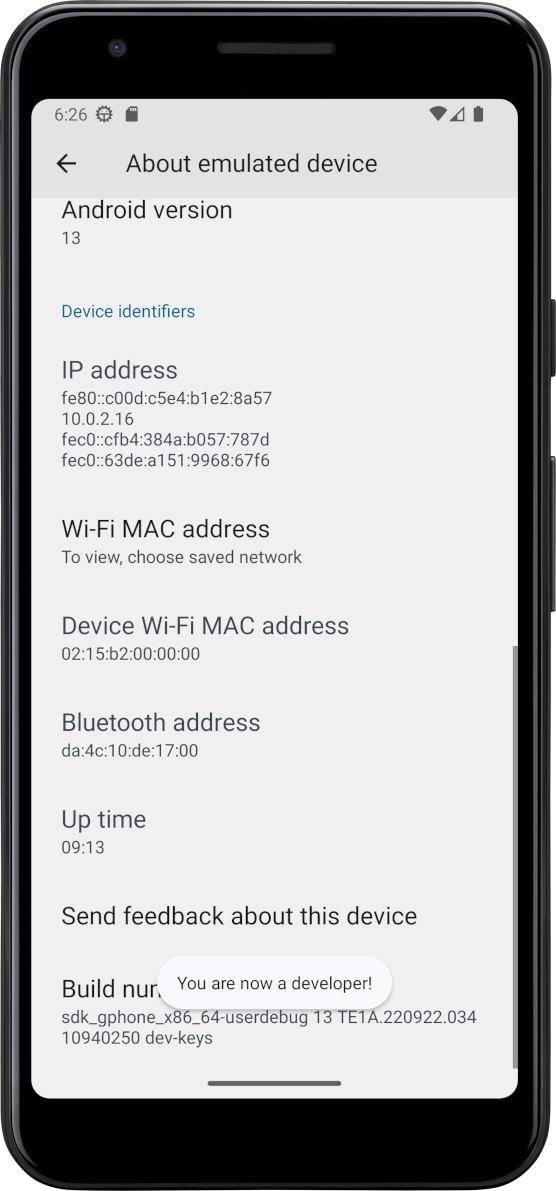
- Build Number: Find the "Build Number" option. On some devices, this might be under "Software Information."
- Enable Developer Mode: Tap on "Build Number" seven times. You should see a message that says "You are now a developer!"
For Samsung Devices:
- Open Settings and go to "About Phone."
- Select "Software Information."
- Find "Build Number" and tap it seven times to enable Developer Mode.
For Xiaomi (MIUI) Devices:
- Open Settings and select "About Phone."
- Tap on "MIUI Version" seven times to enable Developer Options.
Step 2: Enable USB Debugging
After enabling Developer Options:
- Go back to the Settings menu.
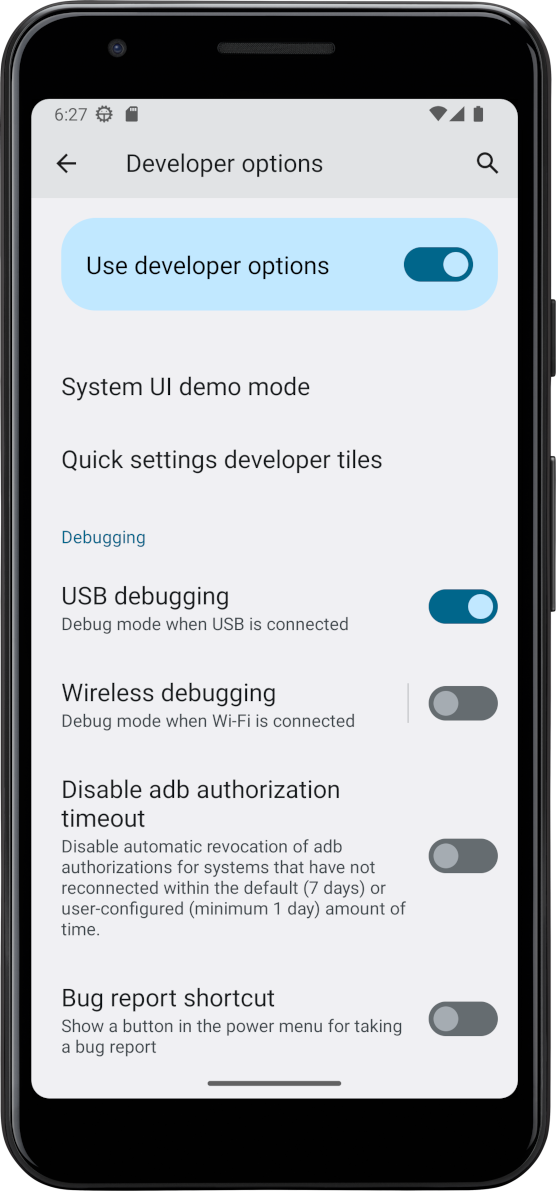
- Scroll down and select Developer Options.
- Scroll to USB Debugging and enable it.
Step 3: Install ADB on Your Computer
For MacOS:
Option 1 (MacOS): Installing ADB using Homebrew (Preferred Method)
Homebrew is a package manager for MacOS that makes installing and managing applications much easier. If you haven't already installed Homebrew, here's how you can do it:
- Open Terminal: You can find the Terminal in your Applications folder under Utilities, or use Spotlight (Cmd + Space) to search for it.
- Install Homebrew: Copy and paste the following command into the Terminal and press Enter:bashCopy code
/bin/bash -c "$(curl -fsSL https://raw.githubusercontent.com/Homebrew/install/HEAD/install.sh)"
Follow the on-screen instructions to complete the installation. - Install ADB: Once Homebrew is installed, type the following command in the Terminal and press Enter:
brew install android-platform-tools
This will download and install ADB and its dependencies.
Option 2 (MacOS): Manually Downloading and Installing ADB
If you prefer not to use Homebrew, you can manually download ADB:
- Download ADB: Visit the Android developer site and download the SDK Platform-Tools for MacOS.
- Extract the ZIP File: Once downloaded, locate the ZIP file (usually in your Downloads folder) and double-click it to extract it. You can move the extracted
platform-toolsfolder to a location of your choice, like your home directory. - Add ADB to Your PATH:
- Open Terminal.
- Run the following command to open your
.bash_profileor.zshrcfile (depending on your shell). If you're using Bash, typeopen -e ~/.bash_profile. If you're using Zsh (default on newer MacOS versions), typeopen -e ~/.zshrc. - Add the following line to the file, modifying the path to match where you placed the
platform-toolsfolder:bashCopy codeexport PATH=$PATH:/path/to/platform-tools - Save the file and close it.
- Back in the Terminal, apply the changes by typing
source ~/.bash_profileorsource ~/.zshrc.
For Windows:
- Download ADB: Go to this link and download the SDK Platform-Tools for Windows.
- Extract Files: After downloading, extract the ZIP file to a folder on your computer (e.g.,
C:\adb).
Step 4: Connect Your Device to the Computer
- Use a USB cable to connect your Android device to your computer.
- You might see a prompt on your device asking you to authorize USB debugging. Tap "OK" to continue.
Step 5: Running the ADB Command
For MacOS Users:
- Open Terminal: You can find the Terminal app in your Applications folder, under Utilities, or search for it using Spotlight (Cmd + Space).
- Navigate to ADB Directory: If you installed ADB using Homebrew, it should be accessible globally. Otherwise, you'll need to navigate to the folder where
adbis located. If it's in your Downloads folder, typecd Downloads/platform-tools. - Connect Your Device and Check Connection:
- Connect your device to your Mac using a USB cable.
- In Terminal, type
./adb devicesand press Enter. You should see a serial number followed by 'device', indicating that your device is connected. - If your device is not listed, check your USB connection, ensure USB debugging is enabled, and that you have allowed USB debugging permission on your phone.
- Run the ADB Command:
- Type the following command and press Enter:bashCopy code./adb shell pm grant com.pedronveloso.lazulite android.permission.DUMP
- If there's no error message, the command has run successfully.
- Type the following command and press Enter:bashCopy code./adb shell pm grant com.pedronveloso.lazulite android.permission.DUMP
For Windows Users:
- Open Command Prompt: Search for
cmdin the start menu and open Command Prompt. - Navigate to ADB Directory: If you extracted the ADB files to
C:\adb, typecd C:\adband press Enter. If you placed the folder somewhere else, adjust the command accordingly. - Connect Your Device and Check Connection:
- Use a USB cable to connect your Android device to your computer.
- Type
adb devicesin Command Prompt and press Enter. Your device should appear in the list. - If it's not listed, ensure the USB connection is secure, USB debugging is enabled, and check your phone’s screen for any prompts.
- Run the ADB Command:
- Enter the following command:
cmd - Copy code
adb.exe shell pm grant com.pedronveloso.lazulite android.permission.DUMP - If there are no errors, the command has been executed successfully.
- Enter the following command:
Common Issues and Solutions:
- Device Not Detected: Ensure USB debugging is enabled on your phone. Check the USB cable and USB port. Sometimes changing the USB mode (MTP, PTP) can help.
- Unauthorized Device: If
adb devicesshows your device as 'unauthorized', check your phone’s screen for a USB debugging authorization prompt. - Command Not Found: If you get a 'command not found' error, ensure you're in the correct directory where ADB is located. For Homebrew installations on Mac, this shouldn't be an issue.
- Permission Errors on Mac: If you receive a permission error on Mac, try adding
sudobefore the command, likesudo ./adb shell pm grant.... This runs the command with administrative privileges.
Conclusion
Once you've successfully run the command, Lazulite will have the permissions it needs. If you run into any issues that aren't listed here or need further assistance, don't hesitate to contact support for more help.